Homemade Lunch Meat
on Feb 05, 2026
This post may contain affiliate links. Please read our disclosure policy.


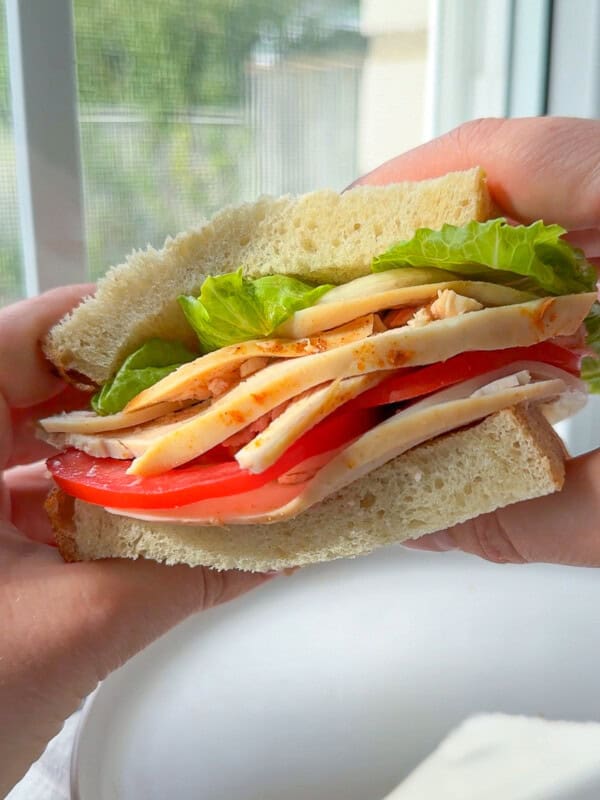
No more nitrates, nitrites, and hidden additives you can’t pronounce 🚫. It’s time to elevate your sandwich 🥙 game with Homemade Lunch Meat. This recipe shows you how to create a deli-style loaf at home so you get the same grab-and-go convenience as packaged lunch meat – but with clean ingredients 🌱. It’s perfect for packing lunches, building high-protein snack boxes, or prepping healthy meals for the week 🙌.
Key Takeaways
- Homemade Lunch Meat features clean, simple ingredients without nitrates, nitrites, or additives.
- This recipe is budget-friendly and perfect for meal prep, allowing you to slice and enjoy high-protein meals throughout the week.
- You can customize your homemade lunch meat with various proteins and flavors.
- For best results, serve with healthy bread or salad, and consider pairing with side dishes like onion ring chips.
- You can freeze homemade lunch meat for longer preservation, making it convenient for meal prep.
Table of Contents
Why You’ll Love Homemade Lunch Meat
🌱 Clean ingredients: No nitrates, nitrites, gluten, sugar, or additives – just real food.
👌 Perfect for meal prep: Make once, slice all week for easy high-protein meals. It will last 4-5 days in the fridge since it has no preservatives, and up to 2 months in the freezer. (I personally haven’t tried freezing it, so let me know in the comments if you do!)
💸 Budget-friendly: Buying sliced lunch meat adds up fast. On the other hand, making your own gives you better quality for less.
🥙 Versatile protein: Mild flavor works for sandwiches, wraps, and snacks so you never get bored.
Nonna’s Tip 🔪
For ultra-thin deli slices, chill cooked meat overnight inside the press, then cut using a very sharp knife or deli meat slicer.

Variations and Substitutions for Homemade Lunch Meat
- You can make any of your favorite deli meats using this method with proteins such as ground turkey, ground pork, or ground chicken 🐔. Obviously, the taste of the cold cuts will depend on the type of meat you use. Fattier cuts like pork will taste richer than leaner cuts like turkey or chicken.
- Instead of using ground meat, process your own by cutting meat into cubes, adding it to a food processor, and blending until it forms a paste. Then, add the paste to your deli meat press and prepare using the instructions in the recipe card below.
- Low-sodium diet? This recipe allows you to use your seasonings to taste, so you can control your salt 🧂 intake.
- To mimic a smoky deli taste and aroma, add a tiny amount of liquid smoke, smoked paprika, and black pepper.
- Spice things up with flavors such as red pepper flakes or cayenne 🌶️.
Best Served With
- Two slices of my Healthy Sandwich Bread 🍞.
- A side of Viral Onion Ring Chips.
- This Simple Green Salad 🥗.
- My simple 2 Ingredient Cottage Cheese Wraps or Cottage Cheese Pita Bread.
Similar Recipes


Common Questions
Yes. Ground turkey can be seasoned, pressed into a loaf, and cooked until firm. Once chilled, it becomes sliceable and works just like traditional deli lunch meat.
Ground turkey creates a uniform shaped loaf that slices evenly like classic deli meat. Chicken or turkey breast versions have a natural grain and a more roasted texture.
Yes. Making lunch meat at home helps you avoid preservatives, fillers, added sugars, and high sodium levels found in many pre-packaged lunch meats.
It typically lasts 4–5 days in the refrigerator (as it has no preservatives) when stored in an airtight container. However, slices can also be frozen for longer storage, making it perfect for meal prep.
Yes. Slice the loaf first, place parchment between slices, and freeze in a sealed container for up to 2 months. This makes it easy to thaw portions as needed.
Homemade Lunch Meat
Equipment
Ingredients
- 2 pounds ground turkey, chicken or pork work as well
- 2 teaspoons salt
- ½ teaspoon pepper
- 1 teaspoon garlic powder
- 1 teaspoon paprika
Instructions
- Note: feel free to use any ground meat of choice such as: chicken, pork, or turkey. Alternatively, you can process your own meat by cubing it and adding it to a food processor with your seasonings until it looks like a paste.
- Mix the ground meat in a bowl with the seasoning.

- Remove the spring and top from the stainless steel meat press. Lightly oil the inside of the meat press using a neutral oil.

- Add the meat a little bit at a time into the press, packing tightly as you go and making sure not to leave any spaces.

- Note: the meat press is designed for 1.5-2 pounds of meat, not any less. For best results, fill the cylinder to just below the rim.
- Add the flat, round part of the coil against the meat, making sure you press down. Secure and twist the lid closed. This pressure will create those perfectly shaped deli-style slices.

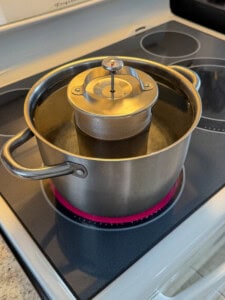
- Simmer in a large deep pot of water until the thermometer reaches 160F. This should take about 90 minutes.
- Note: it's important to add enough water in the pot, making sure it surpasses the level of the meat so that it cooks all the way through.
- After it reaches 160F, take the meat press out of the pot and add it to an ice bath to stop the cooking process. Allow it to cool down fully before refrigerating overnight.
- Note: since the meat press works under pressure, I like to carefully wiggle a knife underneath the lid and gently lift to release it. Otherwise, it will create a vacuum that makes it feel stuck when you try to pull the lid off.
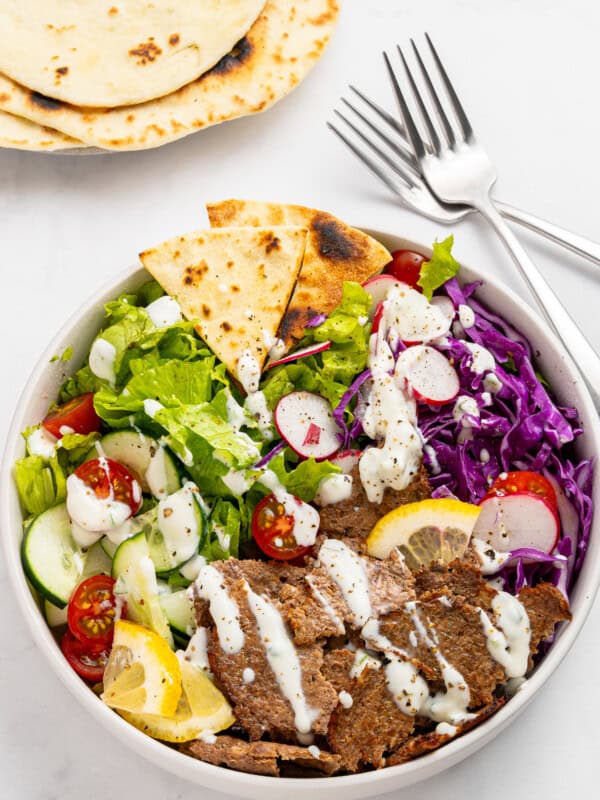
- Once the lid is removed, lift your deli meat out of the cylinder and slice. Enjoy on your favorite wraps, salads, sandwiches and more!
- Scroll up the post for more uses, substitutions, and answers to your frequently asked questions.


Nonna’s Notes
- Proteins: You can make any of your favorite deli meats using this method with ground chicken, ground turkey, or ground pork. Alternatively, you can process your own meat by cubing it and adding it to a food processor with your seasonings until it looks like a paste.
- Low-sodium: This recipe allows you to use your seasonings to taste, so you can control your sodium intake.
- Smoked: To mimic a smoked deli taste and aroma, add a tiny amount of liquid smoke, smoked paprika, and black pepper.
- Spicy: Spice up the flavors with red pepper flakes or cayenne.
- Usage Variations: Make ahead to use in your sandwiches, wraps, protein snack boxes, salads, and lettuce wraps.
- How to get thin slices: For ultra-thin deli slices, chill completely overnight and use a sharp knife or meat slicer for the perfect cut.
My Notes
Nutrition
Nutrition information is automatically calculated, so should only be used as an approximation.


So genius – I can’t wait to try this! I’m super picky when it comes to lunch meat, so this is such a great alternative!
This is so neat! Can’t wait to try this for myself! I already make my own bread, why not lunch meat! THANK YOU!
This is definitely going to be perfect for my daughter’s school lunches! Thank you so much!