Viral Blender Rice Bread (Gluten Free, No Flour!)
on Mar 30, 2026
This post may contain affiliate links. Please read our disclosure policy.

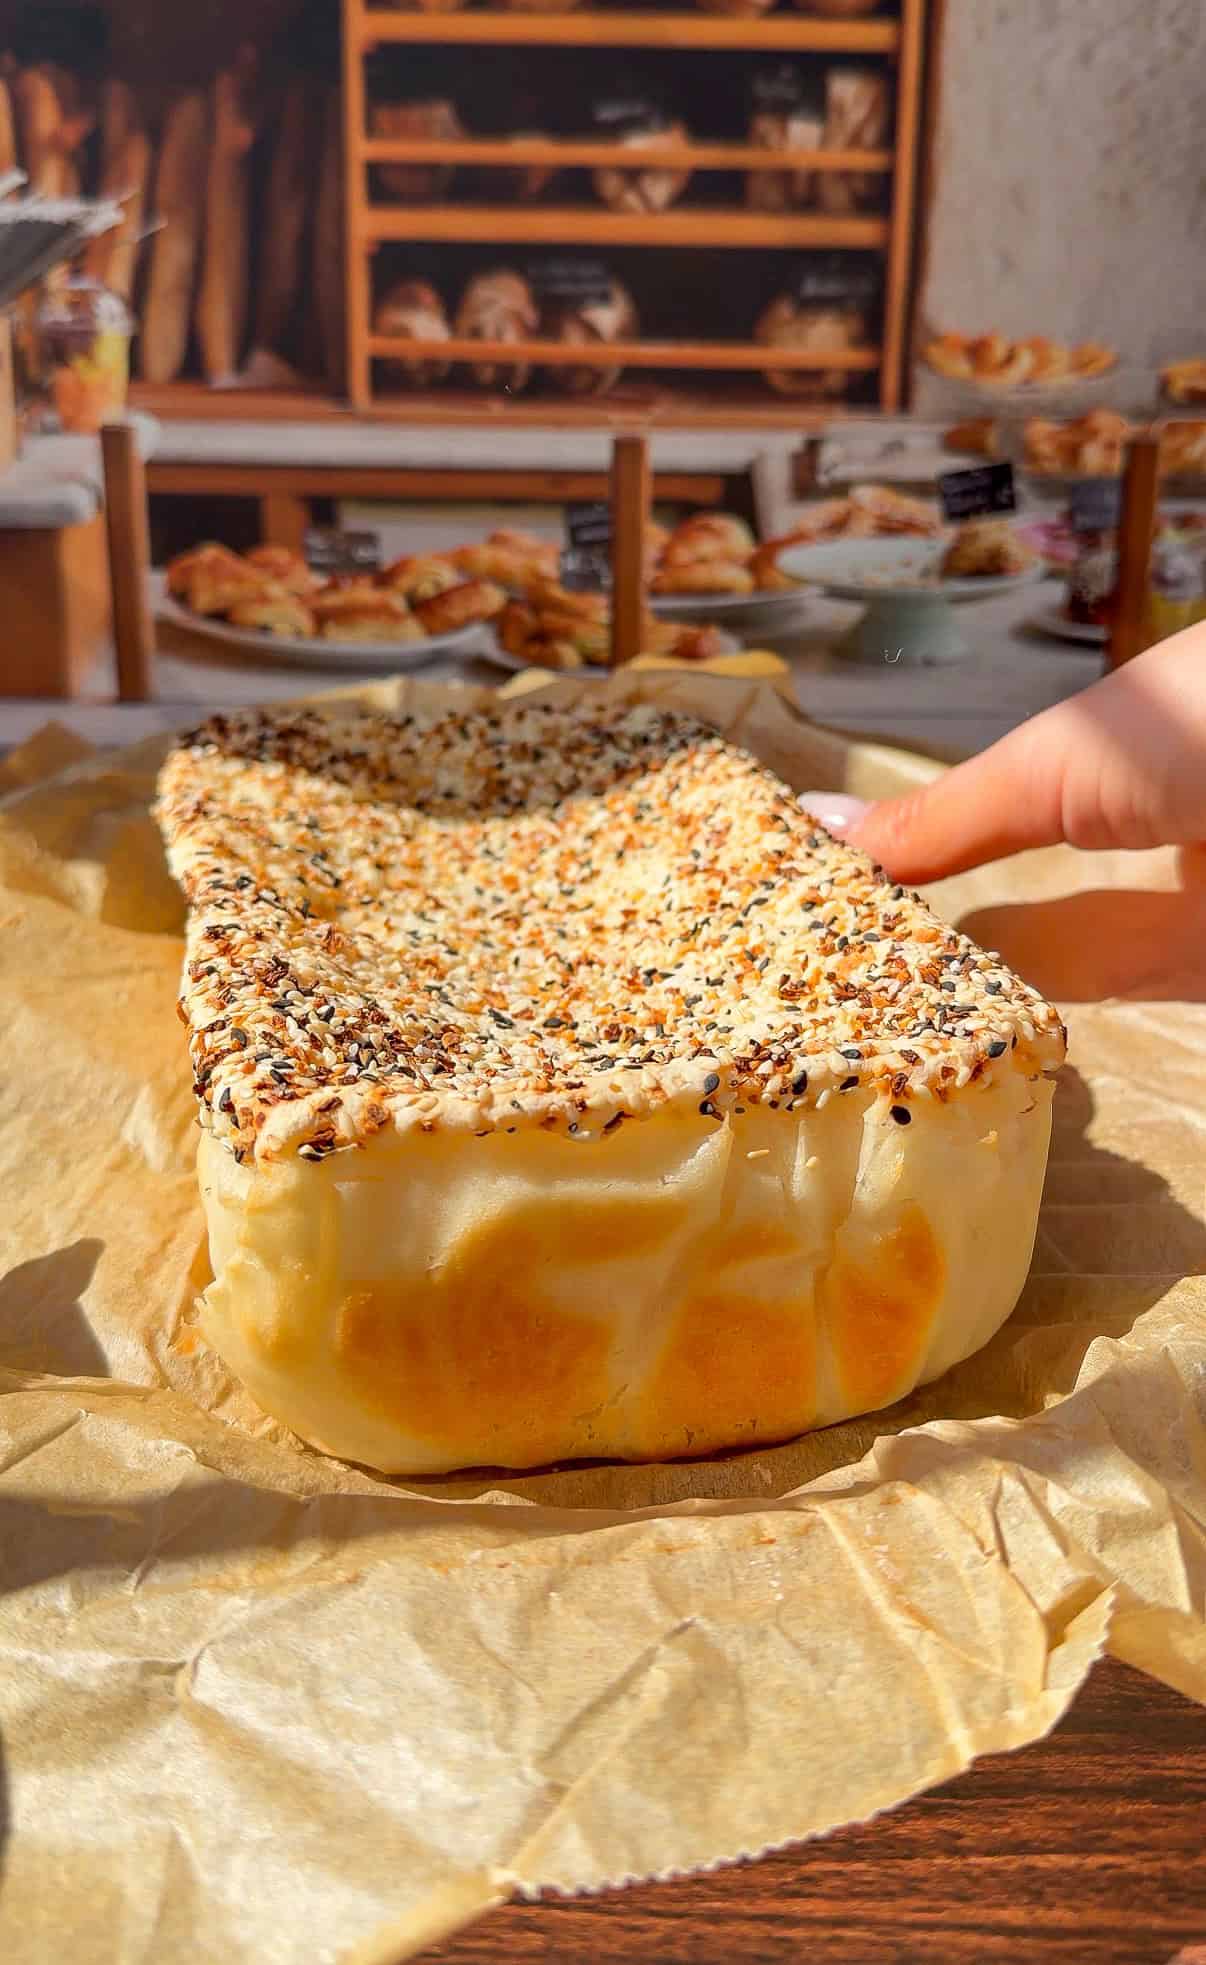
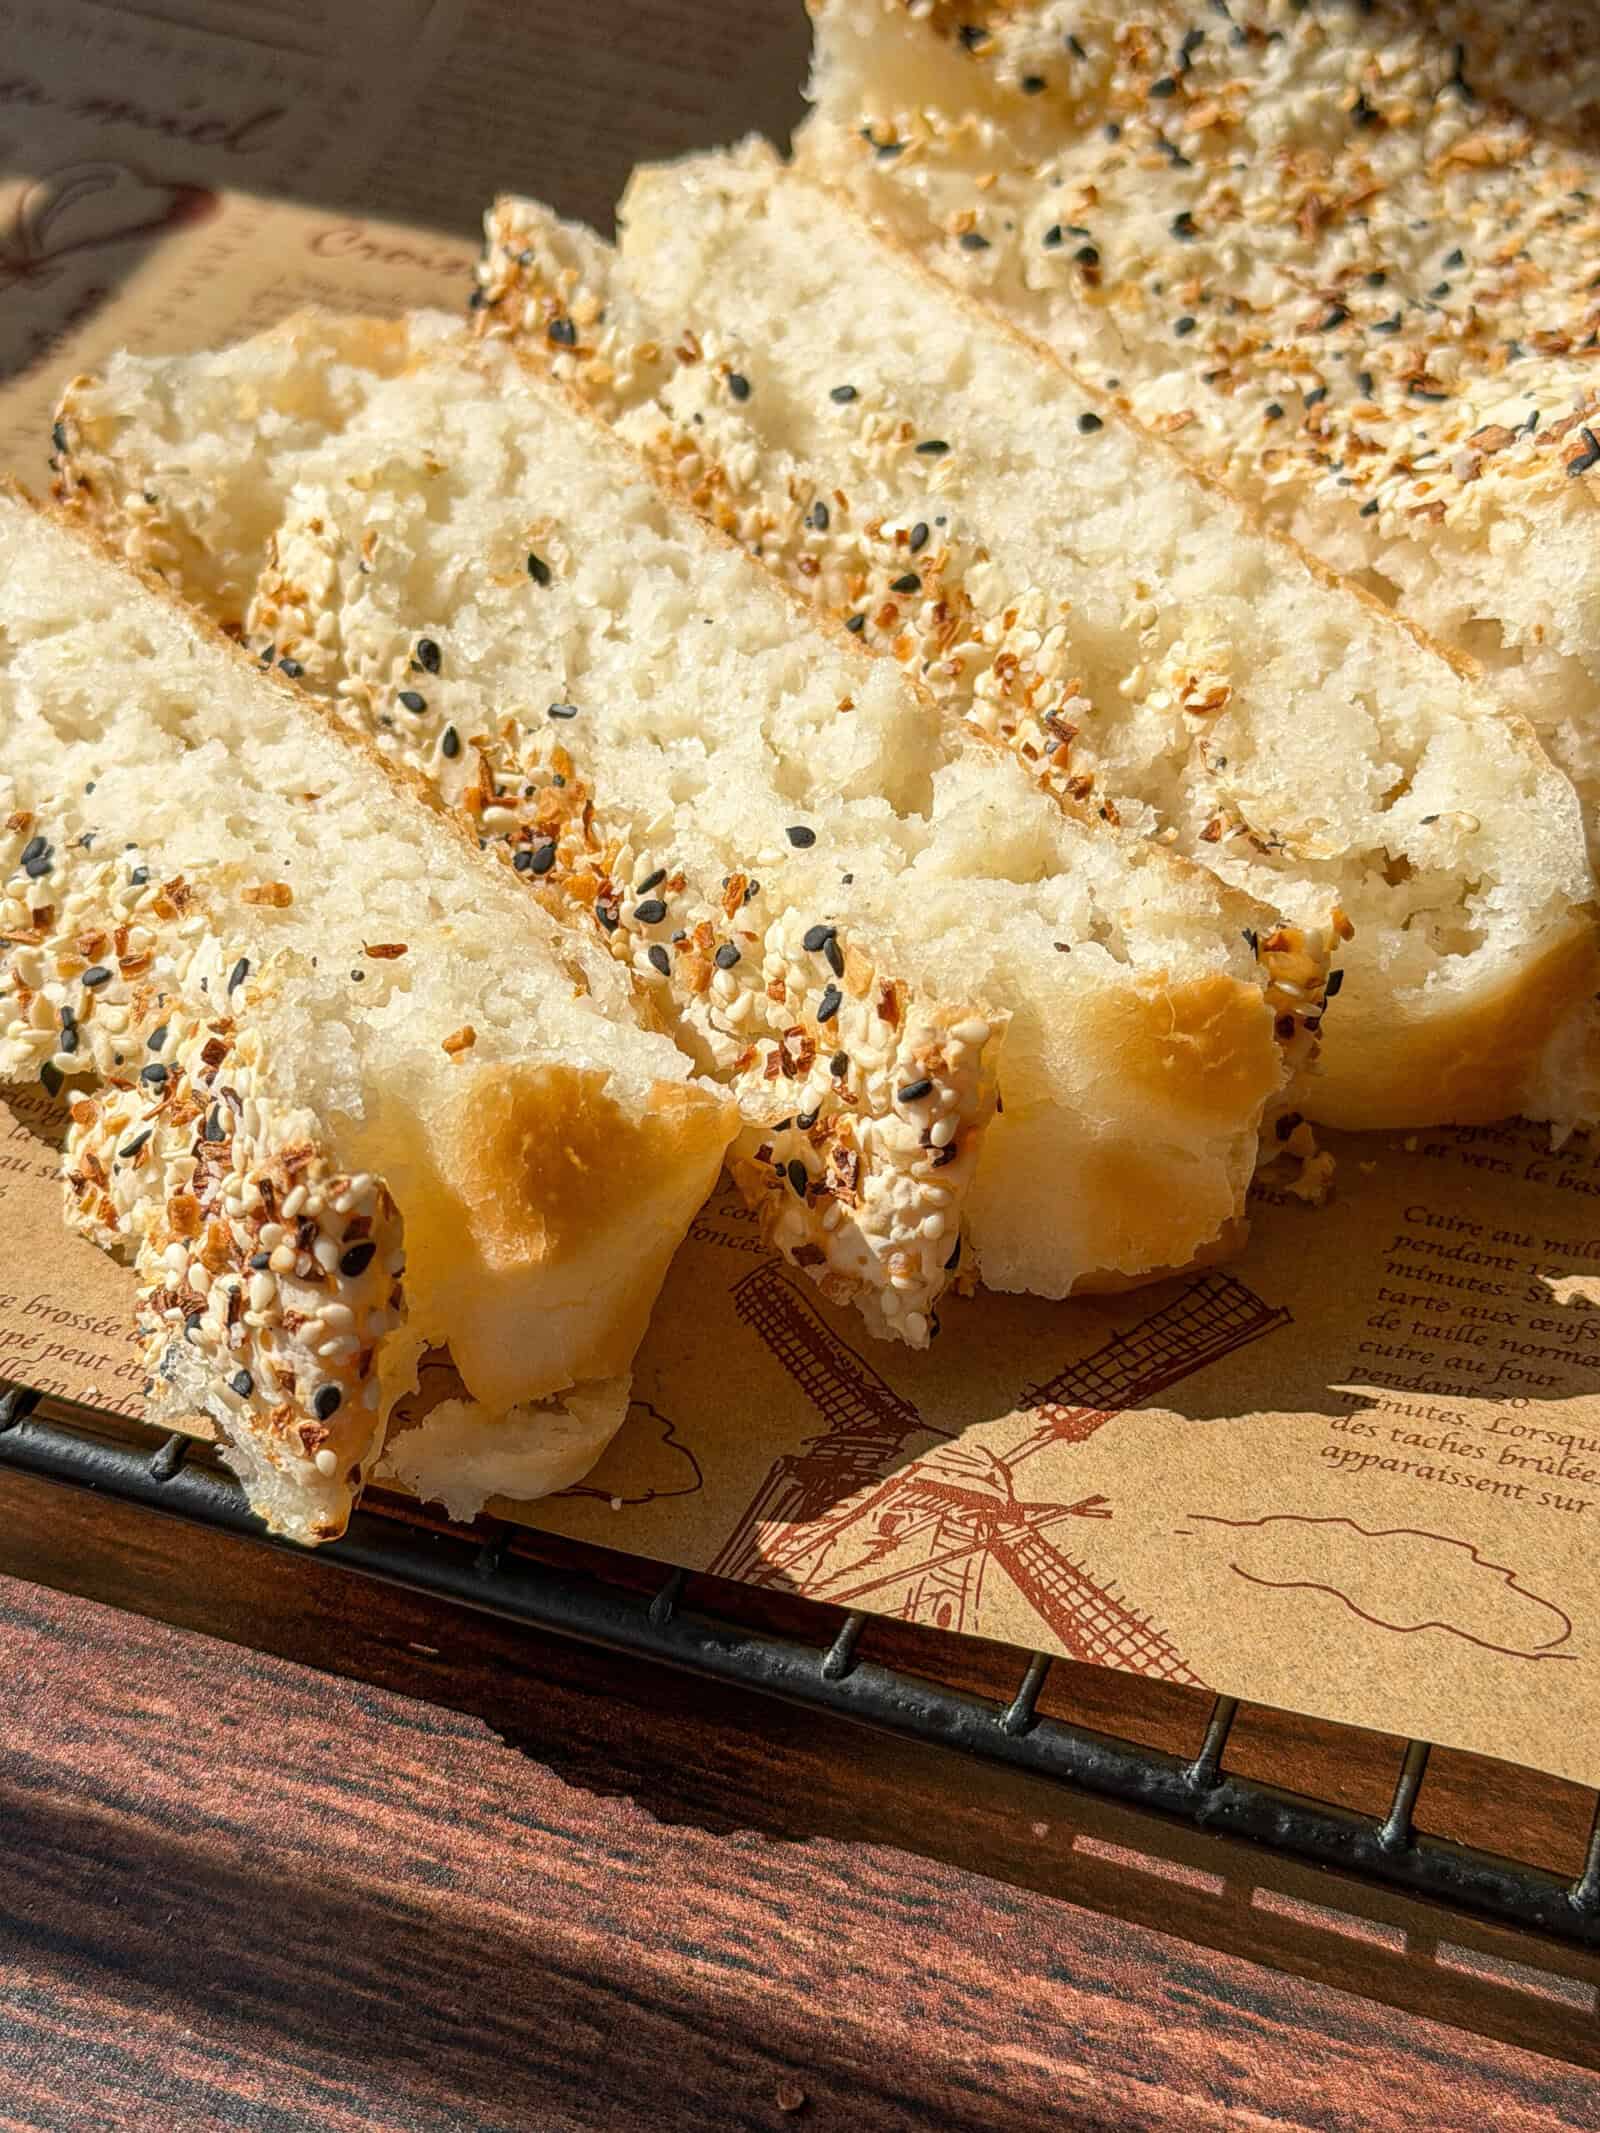
If you’ve seen this Viral Blender Rice Bread blowing up on TIkTok and Insta, there’s a good reason. Well, actually here’s three. Gluten-free? ✅. Made in ONE blender? ✅. Only 100 calories per slice? ✅. Inspired by the Japanese method of soaking rice overnight, this flourless bread is soft, fluffy, and naturally gluten-free. The best part? It’s so easy to make – even if you’re not an experienced baker 👩🍳. Simply dump, blend, and bake. It’s also perfect for meal prep. Bake once and enjoy with your favorite breakfasts and lunches – such as Grated Egg Avocado Toast and Homemade Lunch Meat – all week long 🙌.
Key Takeaways
- Viral Blender Rice Bread is gluten-free, easy to make, and only 100 calories per slice.
- It’s made in one blender and uses real ingredients, making cleanup a breeze.
- Soak the rice overnight for the fluffiest texture and enjoy with your favorite breakfasts and lunches all week long.
- You can customize the recipe by using the food processor method, different sweeteners, or other types of rice.
- This bread stores well and can be frozen for later use, making it perfect for meal prep.
Table of Contents
Why You’ll Love Viral Blender Rice Bread
🧼 Easy cleanup: If cleaning the kitchen isn’t your fave, then you’ll love this one. It’s made in one blender – yeast and all. Seriously.
🙅🏽♀️ No flour needed: The base of this bread is rice, so it’s naturally gluten-free.
🍚 Real ingredients: Many store bought breads are loaded with preservatives. This bread is made with real, clean ingredients that you probably already have in your pantry.
🥣 Meal prep friendly: Holds up well for 3-4 days and is the perfect base for breakfasts and quick lunches.
Nonna’s Tip 🍚💧
Soak the rice in water overnight so it softens and blends into the batter smoothly. This is key to creating the fluffiest loaf.
Variations and Substitutions for Viral Blender Rice Bread
- No blender? No problem! You can make this with an immersion blender instead.
- Play with the shapes 🍞! Bake in a large loaf pan, make 2 mini loaves, or shape into rolls – it’s perfectly versatile so you never get bored.
- Swap the sweetener. Instead of honey 🍯, feel free to use agave or your favorite sweetener instead.
- Use instant yeast instead of active dry yeast. You can totally make this swap and skip the proofing step by mixing it directly into the batter.
- Instead of white rice 🍚, swap for brown rice. You’ll still need to soak it overnight and your gluten-free rice bread will be slightly denser.
Best Served With
- Peanut Butter Jelly Cottage Cheese Toast
- Best Avocado Toast Recipe
- Homemade Lunch Meat
- Chicken Deli Meat Recipe
Similar Recipes


Common Questions
Yes, this step is key to making the fluffiest bread. Soaking overnight softens the rice so that it blends smoothly and creates a soft, chewy texture.
Make sure your yeast is active and your water isn’t too hot (which can kill the yeast). The dough should also rest in a warm spot to rise properly.
Yes! Freeze baked bread in an airtight container or zip top bag for up to 2 months. Bonus tip: slice then freeze so you can use in individual portions as needed.
Store in an airtight container at room temp for 2 days. Additionally, it will keep in the fridge for up to 5 days.
Good question! This can happen if the rice wasn’t soaked long enough, the batter wasn’t blended smooth, or the bread was underbaked.
Viral Blender Rice Bread (Gluten Free, No Flour!)
Equipment
Ingredients
- 350 grams rice, I used short grain Italian
- 200 millilitres warm water, warm not hot
- 5 grams salt
- 7 grams active dry yeast
- 20 grams honey
- 30 grams avocado oil, any will work
Instructions
- Soak the rice in water overnight.
- In the morning, drain and discard the soaking water.
- In your blender, combine the warm water, honey, and yeast. Let it sit for 5-10 minutes, until foamy.
- Add the soaked rice, salt, and oil to the blender. Blend until smooth and fully combined. The mixture should feel smooth, not grainy.
- Pour the mixture into a parchment-lined loaf pan and spread evenly.
- Let it rest at room temperature for 1 hour to rise.
- Place the pan in a cold oven, then bake at 350F (175C) for 30-40 minutes, or until set and lightly golden. Let it rest, and enjoy!
Nonna’s Notes
- No powerful blender? No problem! You can make this with an immersion blender instead.
- Play with the shapes! Bake into a large loaf, 2 mini loaves, or rolls – perfectly versatile so you never get bored.
- Swap the sweetener. Instead of honey, feel free to use agave or your favorite sweetener instead.
- Use instant yeast. You can swap dry active yeast for instant yeast and skip the proofing step by mixing it directly into the batter.
- Swap white rice for brown rice. You’ll still need to soak it overnight and the bread will be slightly denser.
My Notes
Nutrition
Nutrition information is automatically calculated, so should only be used as an approximation.


