Authentic Italian Chicken Cutlets
on Oct 14, 2025, Updated Jan 28, 2026
This post may contain affiliate links. Please read our disclosure policy.

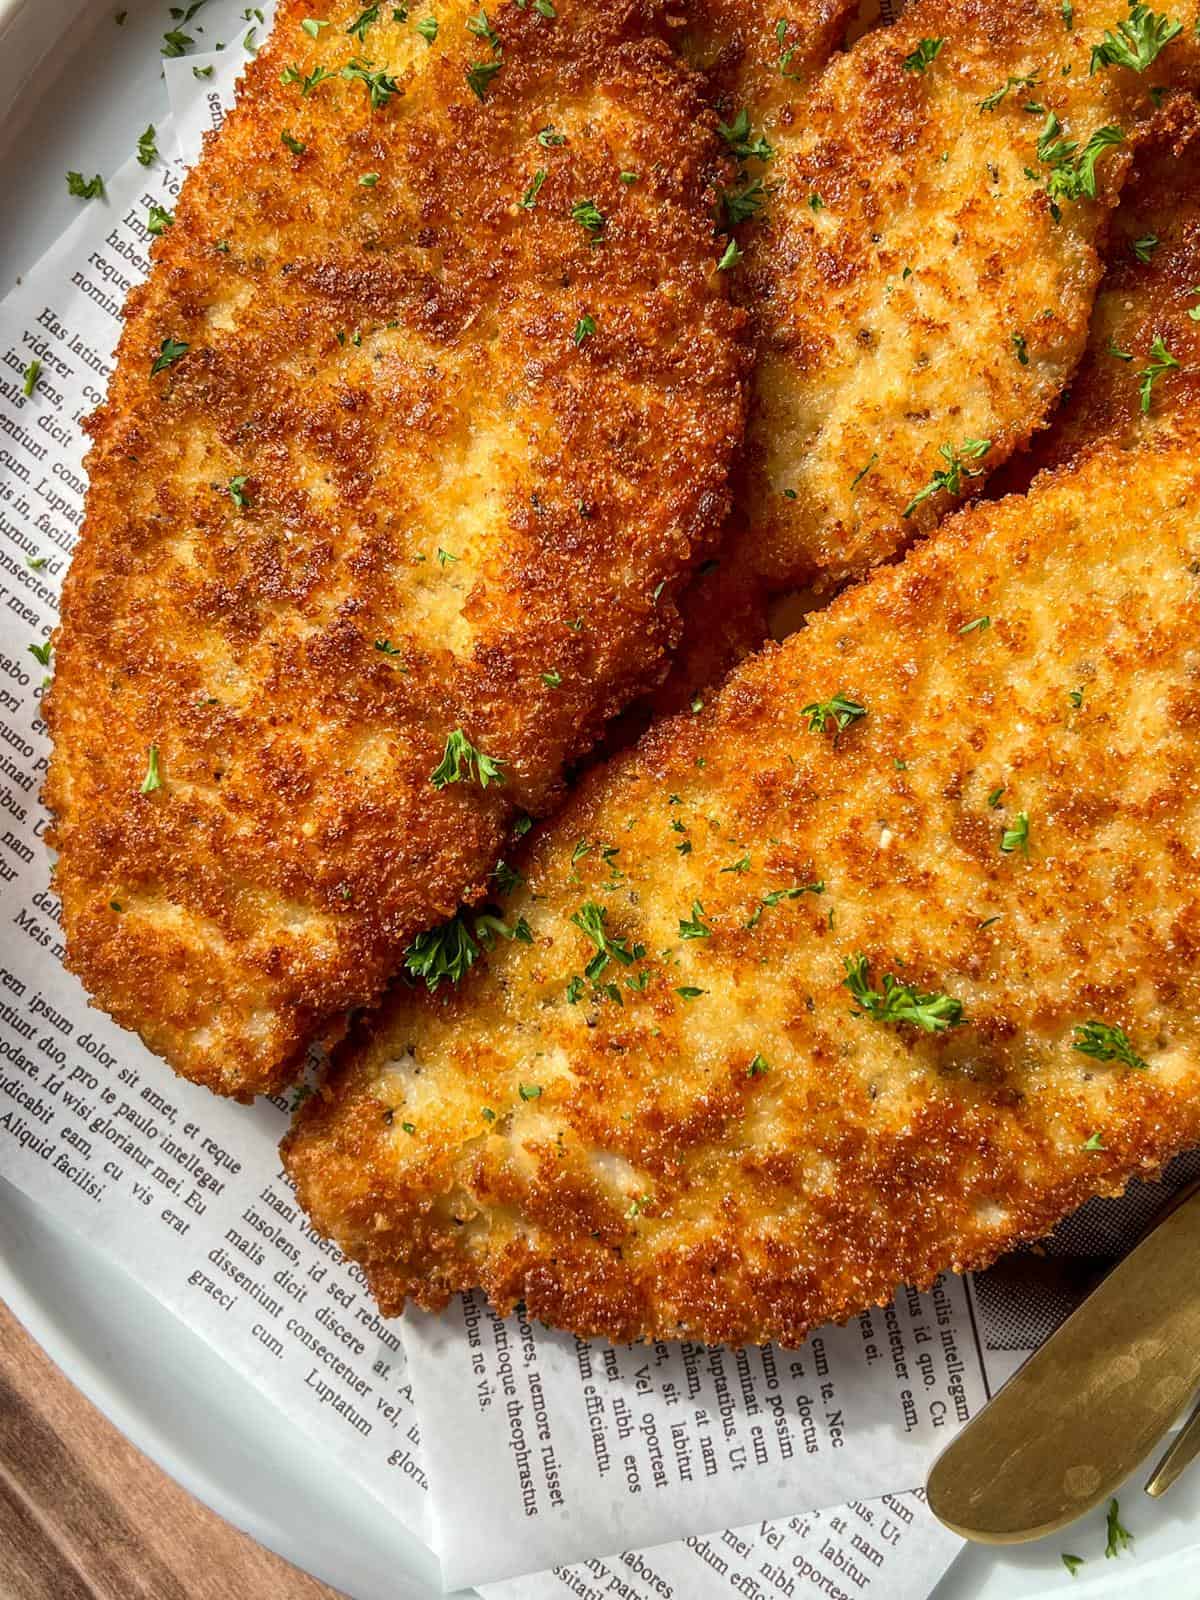
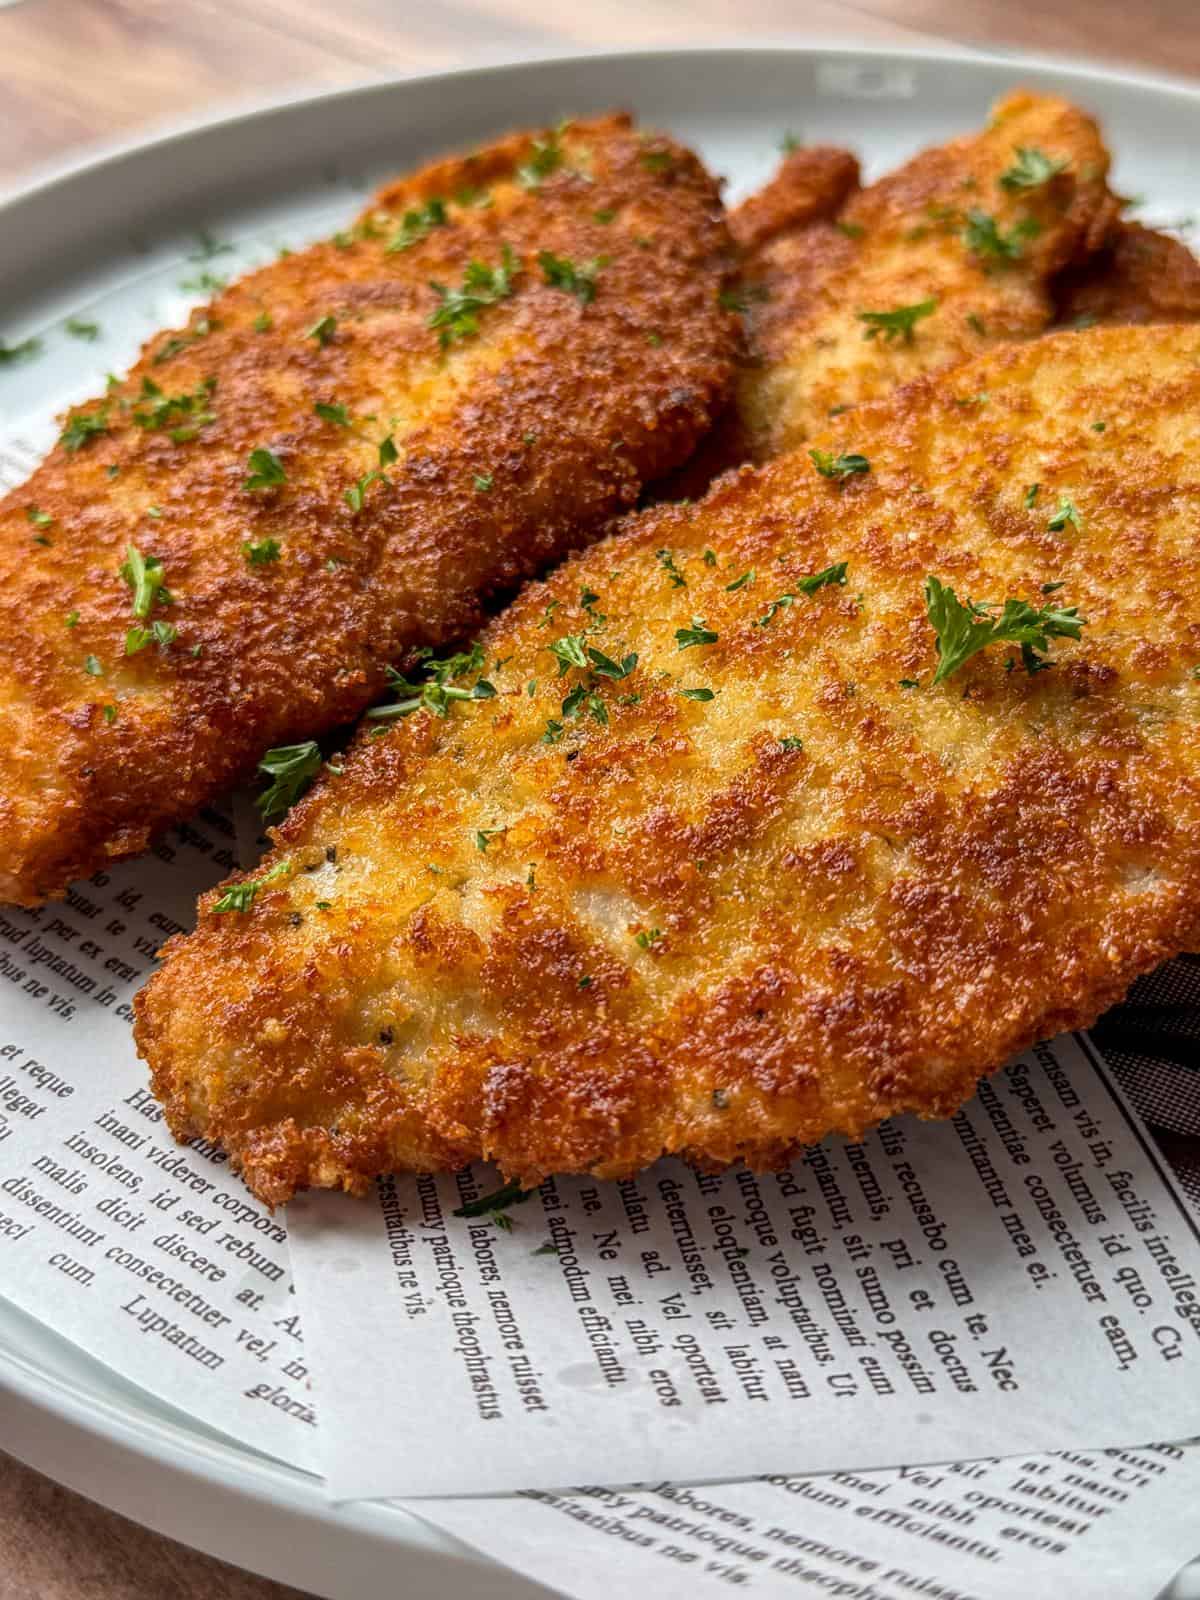
Channel your inner Nonna 👵 with these crispy Authentic Italian Chicken Cutlets, passed down from Steve’s mom and Nonna – the real OGs. Because every great recipe starts with someone’s grandma yelling “You’re doing it wrong 🤌”. Juicy chicken gets coated in homemade breadcrumbs, the kind made from real bread and Parmigiano Reggiano, then shallow-fried to golden perfection. They’re quick, crunchy, and go with absolutely everything. Serve them with pasta 🍝, a fresh salad 🥗, or stuff them in a sandwich or wrap for the ultimate cozy-meal moment.
Key Takeaways
- In short, our Authentic Italian Chicken Cutlets recipe is thin, juicy, and coated in homemade breadcrumbs for a crispy texture.
- Plus, they are versatile and can be served with pasta, salad, or in a sandwich.
- The recipe uses boneless chicken breasts, all-purpose flour, eggs, and homemade breadcrumbs with Parmigiano Reggiano.
- To ensure even cooking, pound the chicken for even cooking; avocado oil is best for frying due to its high smoke point.
- If needed, you can also use store-bought breadcrumbs with added Parmigiano Reggiano for extra flavor.
Table of Contents

Table of Contents
Why You’ll Love Authentic Italian Chicken Cutlets
If there’s one Italian classic you need in your rotation, it’s these Chicken Cutlets – crispy, golden and full of flavor. Each bite starts with thin, juicy chicken coated in real Italian Breadcrumbs made from fresh bread and Parmigiano Reggiano 🧀🥖 . As they sizzle in the pan, they fill the kitchen with that nostalgic, Sunday-dinner aroma that makes everyone hover around the stove 👀. The texture is everything: light and crisp on the outside, perfectly juicy and tender inside. These cutlets capture that rich, savory taste of true Italian home cooking – the kind that makes you close your eyes on the first bite. Serve them over pasta 🍝, in a sandwich 🥪, or alongside a simple salad 🥗 for a meal that never gets old.
Ingredients
🍗 Chicken Breasts: Use 3 boneless, skinless chicken breasts, sliced in half and pounded thin. You’ll end up with six cutlets total.
🧂 Salt and Pepper: Season the chicken generously on both sides, and again in the eggs.
🌾 All-Purpose Flour: The first step in the dredging station. This helps everything stick and gives that golden crispy base.
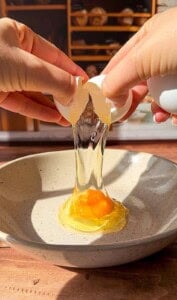
🥚 Eggs: Two large eggs, whisked well with salt and pepper. This is your “glue” layer between the flour and breadcrumbs.
🍞 Homemade Breadcrumbs: The heart of this recipe. Use finely ground breadcrumbs made from good-quality bread and mix with Parmigiano Reggiano for that authentic Italian flavor. You can also use my recipe to make your own Italian Breadcrumbs.
🥑 Avocado Oil: Use enough to coat the bottom of the pan. It has a high smoke point and also keeps the cutlets crisp without overpowering the flavor.
Nonna’s Tip 🤌
Before frying, test your oil by dipping in the end of a wooden spoon. If it bubbles around the wood, you’re good to go.
Variations and Substitutions for Authentic Italian Chicken Cutlets
- I use my homemade Italian Breadcrumbs made from day-old bread and Parmigiano Reggiano 🧀, but if you prefer, you can also use store-bought Italian-style breadcrumbs. Just mix in some finely grated parmesan to boost the flavor.
- I like to fry in avocado oil 🥑 because of its high smoke point and neutral flavor. Alternatively, you can also use light olive oil, canola, or vegetable oil if that’s what you have on hand.
- Swap in a gluten-free flour and your favorite gluten free breadcrumbs to make these gluten-free.
- Feel free to add garlic powder, paprika, or Italian seasoning to your breadcrumbs to boost flavor.
- You can also use this same breading and frying method for eggplant 🍆 or zucchini slices instead of chicken. Just make sure to pat the veggies dry first so the coating sticks perfectly.
Tips for Success:
- Pound the chicken: Use a meat mallet or rolling pin to pound the chicken to an even thinness (about ¼ inch). This helps it cook quickly and evenly, giving you that tender, juicy bite every time.
- Don’t crowd the pan: Fry in batches. Crowding the pan drops the oil temperature and therefore leads to soggy cutlets. Give them space to crisp up beautifully.
- Drain properly: After frying, place cutlets on a wire rack or paper towel–lined tray to remove excess oil and keep them crisp.
- Keep the Oil Clean: Use a slotted spoon or mesh skimmer to remove burnt crumbs between batches, since old crumbs darken the oil and could make the next cutlets taste bitter.
- Add a Bit of Butter for Flavor: Mix a small knob of butter into the oil toward the end of frying for that golden Italian flavor and color.
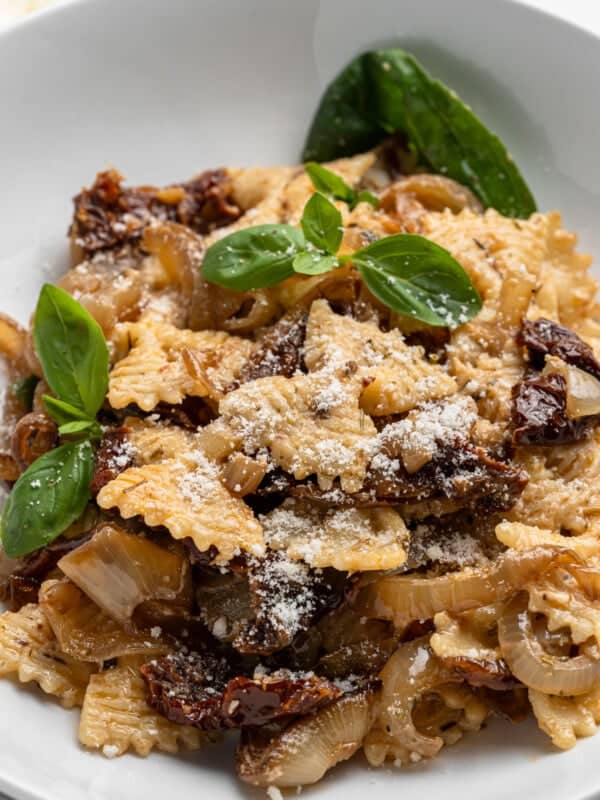
Best Served With
- Over spaghetti with my Italian Tomato Sauce.
- A Simple Green Salad.
- A sandwich or wrap.
- My Invisible Pear Cake for dessert!
Similar Recipes


Common Questions
Certainly! Just choose a good quality Italian-style breadcrumb and then grate in some Parmigiano Reggiano for extra flavor and texture.
I prefer avocado oil because of its high smoke point and neutral flavor.
I like to use stale baguettes. Check out my recipe for Italian Breadcrumbs here.
Absolutely. It’s the key step. Pounding helps the cutlets cook evenly and quickly, and also gives them that thin, classic texture. Don’t skip it!
The cutlets cook quickly! Typically, they’re done when golden brown and the internal temperature reaches 165°F (74°C).
Authentic Italian Chicken Cutlets
Ingredients
The Chicken
The Breading
- ⅓ cup all-purpose flour
- 2 eggs, whisked
- salt, to taste
- pepper, to taste
- 1.5 cups homemade breadcrumbs
- avocado oil (for frying) , enough to cover the bottom of the pan nicely
Instructions
The Chicken
- For the chicken, take each chicken breast and carefully slice it in half. Then take each half, place it in between saran wrap (or parchment) and gently pound them thinly with a meat tenderizer or wooden rolling pin.

- Repeat this until you have 6 thin cutlets. Next, season each side with salt and pepper. Set aside and you prepare the dredging station.


The Breading
- Note: check out my recipe for homemade breadcrumbs here. I like making my own as it makes all the difference. If you use store-bought, make sure you buy Italian and add finely grated Parmigiano cheese to them.
- For your dredging station: Put flour on a plate. In a separate bowl, whisk two eggs and season with salt and pepper. For the last step, you'll have the homemade breadcrumbs.

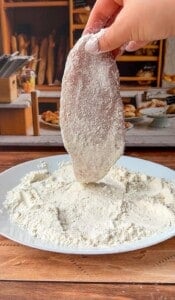
- Take each cutlet, dip and gently press each side in the flour (shaking off the excess).

- Then dip in the whisked eggs.
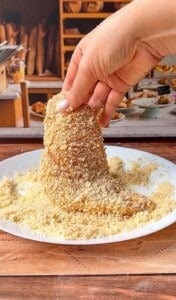
- And lastly coat with the breadcrumbs. Repeat these steps until all of the cutlets are breaded.
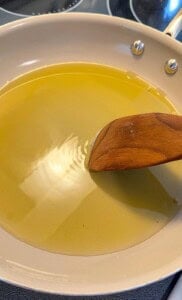
- Once breaded, add enough avocado oil to a pan to coat the bottom nicely. Heat it on medium-high heat or until it shimmers. Tip: You can place a wooden spoon into the oil and if it bubbles up, it’s ready.

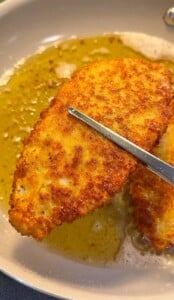
- Take one breaded chicken cutlet at a time, place it in the hot oil away from you. I like to fry 2-3 at a time and not overcrowd the pan. Fry each one for 2-3 minutes until golden and lower the heat to medium-low. You will need to reduce the heat as Parmigiano Reggiano breadcrumbs can burn quicker.

- Once fried, place each one onto a wired rack with foil underneath. Placing them on a wired rack will ensure they remain crispy. Enjoy with pasta, a side salad, in a wrap, sandwich, or any way you like!


Nonna’s Notes
- Pounding: Don’t skip pounding the chicken 🔨! It helps the cutlets cook evenly and keeps them tender.
- Oil Temperature: Make sure your oil is hot 🌡️ before frying. It should shimmer or bubble around a wooden spoon.
- Rack Method: After frying, place the cutlets on a wire rack instead of paper towels to keep them crispy ✨.
- Breadcrumbs: Homemade breadcrumbs make all the difference. Follow my recipe here.
- Heat: Reduce the heat to medium-low as the cutlets cook because the Parmigiano cheese can burn quickly.
My Notes
Nutrition
Nutrition information is automatically calculated, so should only be used as an approximation.


this might just be my new favorite recipe of yours. sooo good! recipe was perfect as written
I made these cutlets and served them using the pairing suggestions and my family LOVED them!
I’m so happy your family loved them, Lynn! We hand select the pairing suggestions for each recipe, and I’m so glad you found them valuable! ❤️
I made this for my family and they absolutely loved it! Definitely adding this recipe to my weekly rotation! ❤️
These came out so crispy! Delicious!
I had these this week. Now they weren’t fresh. They were a few hours old by the time I got a chance to try them, but still 5 Stars.
Made these chicken cutlets last night and honestly, they came out crispy, flavorful, and way easier than I expected! Definitely a new favorite!