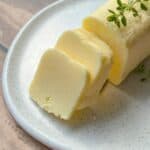
Homemade Butter
Homemade butter is richer, creamier, and miles better than store-bought. It’s nostalgic, rewarding, and yes—you’ll get bonus buttermilk for pancakes 🥞. Make it once and you’ll never go back.
Servings: 6 servings
Equipment
Ingredients
- 2 cups heavy cream 35% milk fat
- salt to taste
Instructions
- Set up your stand mixer with the whisk attachment. Prepare a large bowl of ice water and set the ice water aside.
- Add the heavy whipping cream to the bowl of the stand mixer and turn on the mixer. Starting the mixer on low speed and gradually work up to a high speed, as the cream begins to thicken and splash less.

- Whisk until the cream forms a solid mass of butter and clings to the whisk. This could take anywhere from 7-10 minutes.

- Note: if the whipping cream starts to splatter, you can use a splatter guard or wrap around it with saran wrap.
- You will see the liquid separate from the butter; this is called buttermilk. Reserve the buttermilk for baking, cooking, or enjoying as a refreshing drink.

- Transfer the butter from the whisk to the bowl of ice water. Next, knead the butter a few times—just like bread dough—with your hands while the butter is submerged in the ice water. This is called "washing" the butter.

- Remove the butter from the ice water, add salt, if desired, and shape into a log or whatever shape you like. Store tightly wrapped in parchment paper or in an airtight container in the refrigerator.

Video
Notes
- Serving size: One pint of heavy cream makes 6–8 oz of butter. Nutrition is based on a 1 oz serving.
- Storage tips: Keep butter tightly wrapped or in a sealed container. Unsalted lasts ~5 days; salted lasts ~2 weeks. Discard if it smells sour or shows mold.
- Clarified butter: To make ghee, slowly cook the butter over medium heat until the milk solids separate and settle.
- Customize it: Add herbs, edible flowers, roasted garlic, berries, or honey for your own flavor spin 💐🧄🍓🍯.
- Cold cream is key: It whips faster and separates more cleanly into butter and buttermilk 🧈.
Nutrition
Serving: 1 serving | Calories: 268kcal | Carbohydrates: 2g | Protein: 2g | Fat: 28g | Saturated Fat: 18g | Polyunsaturated Fat: 1g | Monounsaturated Fat: 7g | Cholesterol: 89mg | Sodium: 21mg | Potassium: 75mg | Sugar: 2g | Vitamin A: 1159IU | Vitamin C: 0.5mg | Calcium: 52mg | Iron: 0.1mg
